Growing Garlic: Fall Planting Guide for Home Gardeners
title: "Growing Garlic: Fall Planting Guide for Home Gardeners"
—- title: "Growing Garlic: Fall Planting Guide for Home Gardeners" slug: growing-garlic hub: vegetables category: Vegetable description: "How to grow hardneck and softneck garlic: fall planting timing, depth, spacing, scape removal, harvesting, and curing. Sourced from Extension research." date: 2026-06-10 updated: 2026-06-10 author: "Thomas A." reading_time: 9 —-
I don't grow garlic at my Long Island plot — the ornamental alliums get the bed space in my zone 7a garden. This guide is sourced from Cornell Cooperative Extension, Penn State Extension, and NC State Extension, which publish the most thorough guidance on home garlic production for the Northeast and mid-Atlantic.
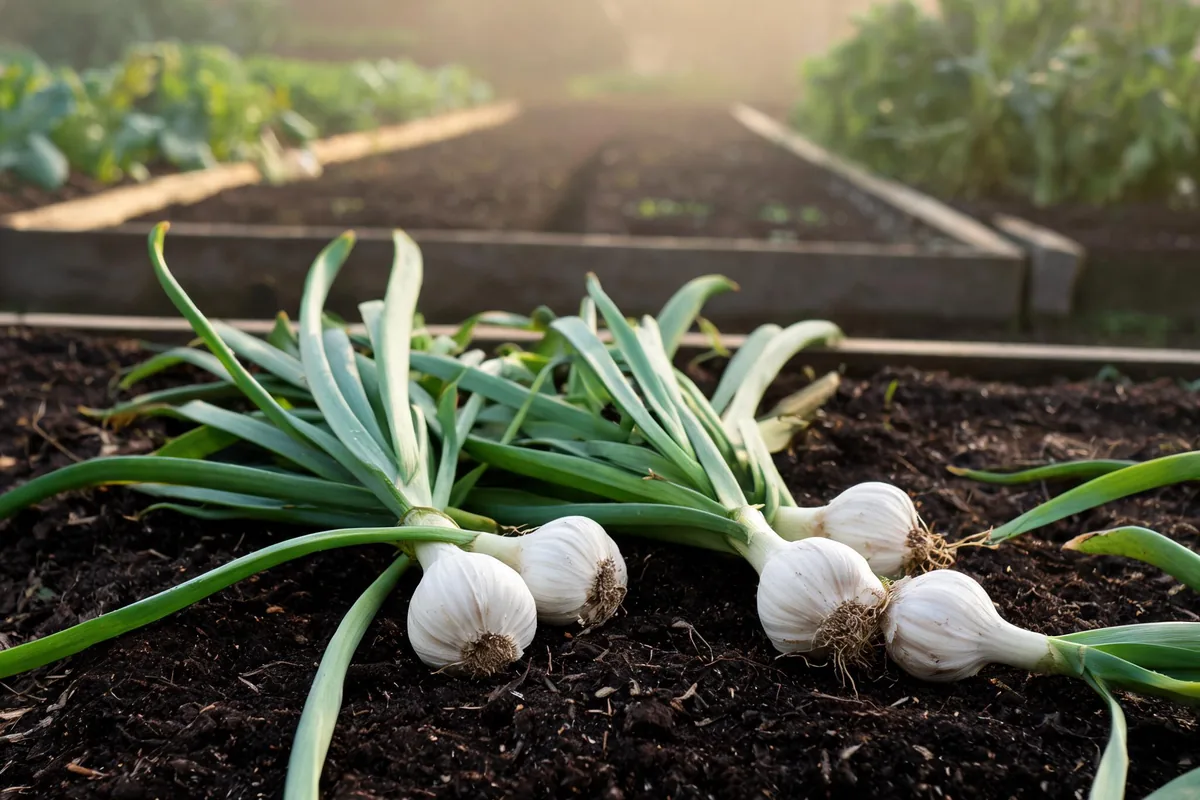
Garlic is the rare vegetable that rewards patience over the long haul. It goes in the ground in fall, sits through a northeastern winter, and comes out in summer — roughly 9 months from clove to bulb. The mechanics are not complicated, but each step has a reason behind it, and understanding that reason makes the difference between garlic that stores through winter and garlic that rots in the ground.
Hardneck vs. softneck: the foundational choice
Allium sativum divides into two major groups:
Hardneck garlic (A. sativum var. ophioscorodon): Per Cornell Cooperative Extension, hardneck types are better adapted to cold climates (zones 3—7) and produce a central woody stem (the \"neck\") with cloves arranged around it in a single layer. Flavor is generally more complex than softneck types. Scapes (the curling flower stalks) must be removed to maximize bulb size. Hardneck types store 3—6 months. Major subtypes: Rocambole ('Spanish Roja', 'Killarney Red'), Porcelain ('Music', 'Georgian Fire'), and Purple Stripe ('Chesnok Red', 'Purple Glazer').
Softneck garlic (A. sativum var. sativum): Per Cornell, softneck types lack a central stem, have multiple layers of cloves, and store 8—12 months — the type sold braided in markets. They perform well in zones 5—9 but are less cold-hardy than hardneck types. Flavor is milder and more uniform. Varieties: 'Inchelium Red', 'California Early', 'Nootka Rose'.
For zone 7a (Long Island), both types perform well, but hardneck types like 'Music' (Porcelain) and 'Spanish Roja' (Rocambole) are most commonly recommended by Northeast Extension programs. Per Penn State Extension, hardneck types are \"preferred for their complex, pungent flavor and adaptability to cold climates.\"
Days to maturity: Garlic planted in fall typically matures in 8—9 months, harvested in late June to mid-July in zone 7a.
USDA zones and temperature requirements
Garlic is grown as a fall-planted annual across USDA zones 3—9. Per Cornell Cooperative Extension, garlic requires vernalization — a period of cold temperatures (35—50°F) after planting to trigger proper bulbing in spring. Without this cold period, cloves grow into single undivided rounds (\"rounds\") rather than segmented bulbs.
Minimum cold requirement: 4—8 weeks of temperatures below 40°F per Penn State Extension. In zones 3—7, winter naturally provides this vernalization. In zones 8—9, refrigerate seed garlic for 4—8 weeks before planting.
Planting timing
Per Cornell Cooperative Extension, plant garlic 4—6 weeks before the ground freezes — in zone 7a, this means mid-October to early November. Planting during this window allows cloves to establish roots before winter without sending up significant above-ground growth.
Too early (before mid-October in zone 7a): Plants develop excessive top growth before winter, which is vulnerable to cold damage. Too late (after November in zone 7a): Insufficient root establishment; plants enter winter without the root system needed to resume rapid growth in spring.
Per NC State Extension, \"fall is the best time to plant garlic\" throughout most of the United States outside of the Deep South. In zones 8—9, plant in October—November.
Planting depth and spacing
Per Cornell Cooperative Extension, plant individual cloves 2 inches deep with the pointed end up, spaced 6 inches apart in rows 12 inches apart. Per Penn State Extension, spacing of 6 inches between cloves is the minimum; 8 inches produces larger bulbs.
The pointed end up instruction is not optional — cloves planted sideways or upside down may still sprout, but germination is slower and plants establish less vigorously.
Selecting cloves: Always plant from the largest outer cloves of each head. Per Cornell, \"plant only the large outer cloves; small inner cloves produce small bulbs.\" Small inner cloves are better used for cooking. Source seed garlic from reputable suppliers rather than grocery store garlic, which may be treated to prevent sprouting or may carry disease.
Mulching: Per Cornell, apply 3—4 inches of straw mulch after planting. Mulch insulates roots through winter, prevents frost heaving, retains moisture in spring, and suppresses weeds. In zone 7a, garlic planted in mid-October without mulch can heave out of the ground during freeze-thaw cycles in late winter. Remove mulch partially in early spring once consistent growth resumes.
Soil and fertilizing
Per Cornell Cooperative Extension, garlic grows best in fertile, well-drained loamy soil with a pH of 6.0—7.0. Waterlogged or compacted soil promotes bulb rot.
Fertility: Per Penn State Extension, incorporate 2—3 pounds of 10-10-10 fertilizer per 100 square feet before planting in fall, or incorporate 3—4 inches of compost. In spring, when plants reach 6 inches tall, side-dress with nitrogen — 1/4 cup of 46-0-0 urea or equivalent per 10-foot row. Espoma Plant-tone 5-3-3 is an organic alternative used at 1 cup per 10-foot row as a side-dress in spring.
Stop fertilizing: Per Cornell, stop nitrogen applications by late May (zone 7a) to avoid promoting soft, poor-storing bulbs. Late nitrogen delays curing and increases disease susceptibility.
Watering
Per Cornell Cooperative Extension, garlic needs about 1 inch of water per week during spring active growth. Per Penn State Extension, \"garlic is not drought-tolerant during the period of rapid bulb expansion (May—June).\" Drought stress during this period significantly reduces bulb size.
Stop irrigation 2 weeks before expected harvest to allow outer wrapper leaves to dry and tighten around the bulb. Wet conditions at harvest promote bulb rot and reduce storage life.
Scape removal
Hardneck garlic produces a scape — a curling flower stalk with a bulbil-bearing spathe at the tip — in early June in zone 7a. Per Cornell Cooperative Extension, \"removing the scape (seed stalk) can increase bulb size by 25 percent.\" Remove scapes promptly when they have formed one full curl, before the scape straightens.
Scapes are edible — they have a mild garlic flavor and are excellent grilled, sautéed, or made into pesto. The 2—3 week period when scapes are available is a secondary harvest.
Softneck types do not produce scapes and require no scape removal.
Harvesting
Per Cornell Cooperative Extension, harvest when \"one-half to three-quarters of the leaves have turned brown.\" In zone 7a, this occurs late June through mid-July for fall-planted garlic.
Per Penn State Extension, do not wait for all leaves to brown — \"if you wait too long, the outer cloves may separate from the bulb, reducing storage life.\" Harvest a test bulb first: wrapper leaves should be papery and distinct; if wrappers are missing or bulb segments are beginning to separate, harvest immediately.
Use a garden fork to loosen soil before pulling. Do not pull tops directly; snapped tops mean the bulb stays in the ground.
Curing and storage
Per Cornell Cooperative Extension, cure harvested garlic in a warm (75—80°F), dry, well-ventilated area out of direct sunlight for 3—6 weeks. Hang in bunches or lay in single layers on screens. Curing allows the outer wrapper leaves to dry and form a protective skin.
After curing, per NC State Extension, trim roots to 1/2 inch and tops to 1—2 inches. Store at 55—65°F (not refrigerator cold, which triggers re-sprouting) with low humidity and good air circulation. Hardneck types keep 3—6 months; softneck types keep 8—12 months.
Pests and diseases
White rot (Sclerotium cepivorum): Per Cornell Cooperative Extension, white rot is the most serious soilborne disease of garlic. Infected plants show yellowing leaves and white mycelial growth at the base of the bulb. The pathogen forms sclerotia (black, poppy-seed-sized bodies) that persist in soil for 20+ years. There is no chemical cure. Do not plant alliums (garlic, onion, leek, chive) in infected soil. Strict crop rotation is the only management strategy.
Fusarium basal rot (Fusarium oxysporum f.sp. cepae): Per Penn State Extension, causes pink-to-brown discoloration of the basal plate and rotting of roots in warm, moist soils. Improve drainage; avoid wet, compacted soil. Rotate to non-allium crops for 3+ years.
Onion thrips: Per NC State Extension, thrips feeding causes silvery streaking and can transmit iris yellow spot virus. Safer insecticidal soap applied at first detection can reduce populations.
Garlic bloat nematode (Ditylenchus dipsaci): Per Cornell, infested bulbs show bloated, soft outer cloves and internal discoloration. Source clean seed garlic from reputable suppliers; do not save infected bulbs.
Common problems
| Symptom | Most likely cause | Fix |
|---|---|---|
| Small, undivided \"rounds\" instead of bulbed heads | Planted too late; no vernalization | Plant October—early November in zone 7a; cold exposure required |
| Bulbs rotting in ground before harvest | White rot or Fusarium; waterlogged soil | Improve drainage; 3+ year rotation away from alliums |
| Scapes not removed; small bulbs | Missed scape harvest | Remove hardneck scapes promptly at first curl |
| Tops break off at harvest | Harvested too wet; pulled without loosening soil | Use fork to loosen; harvest in dry conditions |
| Loose wrapper, separated cloves | Harvested too late | Harvest when 50—75% of leaves are brown |
| Rotting in storage | Curing incomplete; storage too humid or cold | Cure 4—6 weeks; store at 55—65°F with low humidity |
| Silver streaking on leaves | Onion thrips | insecticidal soap at first detection |
Recommended gear: Best Insecticidal Soap: How Potassium Salts Kill Soft-Bodied Pests — our buyer's guide covering picks for every budget, ranked by Extension publication consensus and personal use.
Frequently asked
When should I plant garlic in zone 7a?
Per Cornell Cooperative Extension, plant 4—6 weeks before the ground freezes — in zone 7a (Long Island), this is mid-October to early November. Planting too early allows excessive top growth before winter; too late means insufficient root establishment. Cornell recommends mulching with 3—4 inches of straw after planting to protect roots through winter freeze-thaw cycles.
Should I remove garlic scapes?
For hardneck types, yes. Per Cornell, removing scapes when they have completed one full curl can increase bulb size by up to 25%. Remove promptly — if left until the scape straightens and the bulbil develops, the benefit to bulb size is reduced. Softneck garlic does not produce scapes.
How do I know when garlic is ready to harvest?
Per Penn State Extension, harvest when one-half to three-quarters of the leaves have turned brown — in zone 7a, typically late June to mid-July. Dig a test plant first. The outer wrapper leaves should be papery; the bulb should be fully segmented with distinct cloves. Waiting for all leaves to brown risks bulbs that have lost their wrappers and will not store well.
Why did my garlic bulbs not form?
Per Cornell, garlic cloves that did not receive adequate vernalization (cold temperatures of 35—50°F for 4—8 weeks) will produce rounds rather than segmented bulbs. This most often occurs when garlic is planted too late in fall and doesn't establish before winter, or when mild winters provide insufficient cold. In zones 8—9, refrigerate seed garlic for 4—8 weeks before planting to simulate vernalization.
