Starting a Rain Garden: Site, Sizing, and Plant Selection
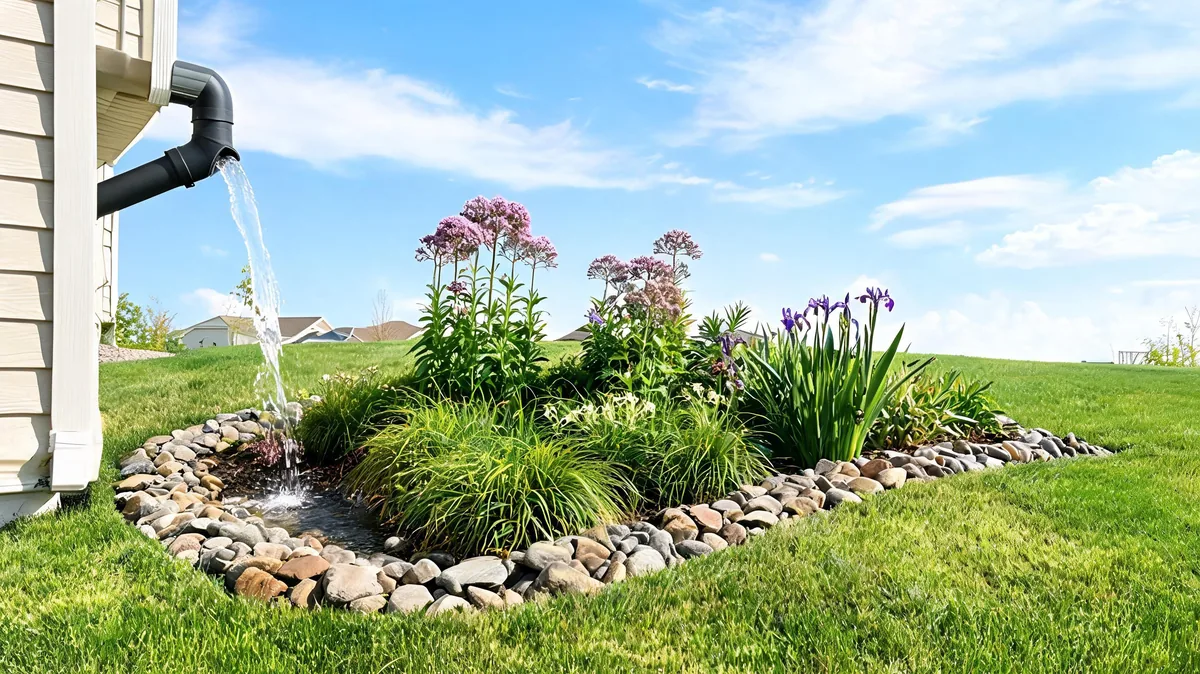
How to start a rain garden — site selection to capture runoff, sizing the basin, selecting plants by zone and moisture tolerance, and the three-zone planting approach that makes rain gardens actually work.
When to plan and plant
Plan in fall or winter, using rain events to observe where water actually flows on your property. Plant in fall (preferred) or spring. Per Penn State Extension, "observing your property during a significant rain event is the most useful site assessment step — you see exactly where water collects, where it flows, and where it exits the property."
Step 1: Site selection — where does the water go?
A rain garden must be located in a low area that collects runoff naturally, or positioned to intercept runoff before it reaches a problem area (foundation, road, stream). Key siting rules per Penn State Extension:
- At least 10 feet from any building foundation (to prevent water intrusion)
- At least 50 feet from a septic system
- Away from areas where water already stands for more than 48 hours after rain (these have underlying drainage problems that a rain garden won't solve)
- Not over shallow utilities — call 811 before digging anywhere
- In a location that receives at least partial sun — most rain garden plants need sun to perform well
Collect runoff from: roof downspouts (redirect with a flexible extension or buried pipe to the rain garden), sloped driveways (intercept with a level spreader before it hits a road), and areas where lawn compaction causes sheet flow during rain events.
Step 2: Test drainage speed
Before finalizing the location, perform a drainage test: dig a hole 6 inches deep and 6 inches across, fill it with water, and time how long it takes to drain completely. Per Penn State Extension, "soil that drains in 24–48 hours is appropriate for a rain garden without amendment." If water sits in the test hole longer than 48 hours, the soil has inadequate permeability — consider amending the rain garden medium with a 50/50 mix of native soil and coarse sand or sandy loam before planting.
Step 3: Size the rain garden
A simple approach: measure the square footage of the surface draining to the rain garden (roof area, driveway section), and size the rain garden at approximately 20–30% of that area for average permeable soils. For a 400 square foot roof section, a 80–120 square foot rain garden is appropriate. Per Rutgers Cooperative Extension, "a properly sized rain garden should be able to infiltrate the runoff from a 1-inch rain event within 24–48 hours."
Depth: 4–8 inches is sufficient for most residential rain gardens. Deeper basins hold more volume but take longer to drain. 6 inches is a good default.
Step 4: The three-zone planting approach
Rain gardens have distinct moisture zones that require different plants:
Zone 1: Pond zone (center/lowest point)
This area may sit in standing water for 12–48 hours after a major rain event. Only plants that tolerate intermittent flooding survive here. Per Penn State Extension, appropriate zone 1 plants include:
- Swamp milkweed (Asclepias incarnata) — zones 3–8, pink flowers, monarch host
- Buttonbush (Cephalanthus occidentalis) — zones 5–9, tolerates standing water
- Swamp rose (Rosa palustris) — zones 3–9, pink flowers in June
- Blue flag iris (Iris virginica) — zones 4–9, violet flowers, tolerates wet soils
- Cardinal flower (Lobelia cardinalis) — zones 2–9, brilliant red, hummingbird plant
Zone 2: Middle slopes
Wet to moist — wet after rain events but drier between rains. Most native rain garden plants do well here. Good choices:
- Joe Pye weed (Eutrochium purpureum) — 4–7 feet, exceptional for late summer pollinators
- Native sedges (Carex spp.) — important structural plants for the rain garden edge
- Swamp sunflower (Helianthus angustifolius) — September–October bloom, native bee plant
- Switchgrass (Panicum virgatum) — 4–6 feet, adaptable to wet-dry cycles, excellent wildlife habitat
- Virginia rose (Rosa carolina) — zones 4–9, pink flowers, red hips
Zone 3: Dry edges (top berms)
The raised edges of the rain garden are actually the driest zone — they shed water to the center and dry out between rain events. Use drought-tolerant plants here:
- Black-eyed Susan (Rudbeckia hirta) — adaptable from dry to moist
- Purple coneflower (Echinacea purpurea) — drought-tolerant once established
- Little bluestem (Schizachyrium scoparium) — drought-tolerant grass, spectacular fall color
- New England aster (Symphyotrichum novae-angliae) — adaptable, exceptional fall bloom
Construction basics
Mark the perimeter with paint or stakes. Remove existing vegetation. Excavate the basin (retain the excavated soil to build the low berm on the downslope side — this holds water in the garden instead of letting it flow out immediately). If amending the soil mix, add the amended medium after excavation. Install plants according to the three-zone layout, mulch with 2–3 inches of hardwood mulch (avoid wood chips in zone 1, which float). Connect the downspout extension or inlet pipe. Per Rutgers Cooperative Extension, "the downspout connection can be as simple as a flexible corrugated pipe extension directed toward the rain garden inlet" — elaborate piping is not required for most residential installations.
Maintenance
Weed through the first two growing seasons while plants establish — rain gardens are wet disturbed areas that favor weeds. After two seasons, the native plants fill in and weed pressure drops significantly. Per Penn State Extension, "an established rain garden requires minimal maintenance beyond annual spring cleanup and occasional replanting of failed plants." Do not fertilize — rain gardens are fed by the nutrient-laden runoff they capture.
